

Dental chair upholstery is exposed to far more wear than ordinary furniture. Every working day, it comes into contact with patients, clothing, perspiration, hair products, cleaning solutions, disinfectants and protective barriers. These repeated exposures can gradually cause staining, hardening, cracking, peeling or loss of cushioning.
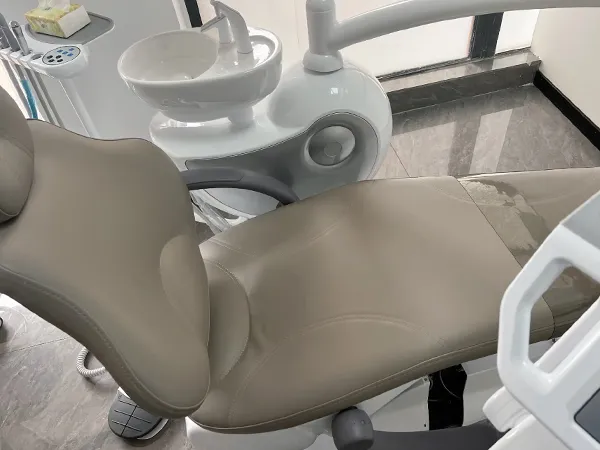
Premature upholstery damage is not always caused by low-quality material. In many cases, an unsuitable cleaning chemical, incorrect dilution, abrasive cleaning tool or accumulated chemical residue is responsible. Even good dental chair upholstery may deteriorate quickly if it is disinfected with products that are incompatible with its surface.
A practical dental chair upholstery maintenance routine should therefore combine correct cleaning, material-compatible disinfection, barrier protection and regular inspection. Using a properly fitted dental chair cover can also reduce direct contact with contaminants and help preserve both dental chair and dental stool upholstery.
This guide explains how to clean dental chair upholstery correctly, what causes it to crack or peel, how protective covers help and when damaged upholstery should be repaired or replaced.
Why Does Dental Chair Upholstery Wear Out?
Understanding why the material deteriorates is the first step toward extending the lifespan of a dental chair.
Repeated Exposure to Incompatible Disinfectants
Dental professionals must follow established infection-control procedures, but not every disinfectant is compatible with every upholstery material.
The upholstery on one dental chair may respond differently from that on another model. Concentration, active ingredients, application method, wet contact time and frequency of exposure can all affect the result.
For example, the A-dec Upholstery Maintenance Guide explains that chemical exposure can shorten the life of upholstered surfaces and that the degree of damage is influenced by the chemicals used, exposure level and exposure time. However, this is manufacturer-specific guidance and should not automatically be applied to every chair.
Repeated exposure to an incompatible product may cause:
- Surface hardening
- Loss of flexibility
- Color fading
- Sticky or tacky areas
- Glossy patches
- Fine surface cracks
- Peeling of the upper layer
- Weakening around stitched seams
The safest approach is to check the dental chair manufacturer’s instructions for use before selecting a cleaner or disinfectant. Do not assume that a product suitable for household vinyl, furniture PU or another dental chair model is safe for your upholstery.
Chemical Residue on the Surface
Some cleaning and disinfecting products leave a visible or invisible film. If this residue accumulates, it may change the appearance and texture of the upholstery.
Residue can be particularly noticeable in:
- Upholstery seams
- Cushion edges
- Headrest joints
- The space between the backrest and seat
- Armrest edges
- Textured surfaces
The solution is not to wipe a disinfectant off immediately. It must remain wet for the contact time specified on its label to achieve the intended disinfection result. After that contact time, follow the chemical and equipment manufacturers’ instructions concerning residue removal, rinsing and drying.
Abrasive Cleaning Tools
Scouring pads, stiff brushes, rough sponges and abrasive powders can permanently damage a soft upholstery surface. Microscopic scratches may initially be difficult to see, but they make the material more vulnerable to staining and chemical penetration.
A soft, non-abrasive cloth is usually the better choice for routine dental chair upholstery cleaning, provided that it is compatible with the selected cleaning product and the chair manufacturer’s instructions.
Aggressive scrubbing should not be used to compensate for an unsuitable cleaner. If a stain cannot be removed safely, seek advice from the equipment supplier rather than damaging the surface through excessive friction.
Body Oils, Perspiration and Hair Products
Dental chair upholstery regularly comes into contact with body oils, perspiration, cosmetics and hair-care products. The headrest is particularly vulnerable because patients may transfer hair dye, styling products, makeup or skin oils onto the upholstery.
Seat and backrest surfaces may also be affected by:
- Sunscreen
- Skin lotion
- Hand cream
- Hair dye
- Oily hair products
- Perspiration
- Residue from clothing
These substances can discolor the material or interact with disinfectants. Removing visible contamination promptly, using compatible barriers and following a consistent cleaning schedule can reduce long-term damage.
Clothing Dye Transfer
Dark-colored denim, leather accessories and other non-colorfast materials can transfer dye onto light dental chair upholstery, especially when combined with heat and perspiration.
Dye transfer may be difficult to remove once it has penetrated the surface. Using a dental chair seat cover provides a physical layer between the patient’s clothing and the upholstery. This can be particularly useful for white, beige and other light-colored chairs.
Sharp Instruments and Repeated Impact
Dental chair upholstery is designed to support patients—not trays, handpieces, keys or sharp instruments. Placing these objects on the chair may puncture or cut the outer material.
Other risks include:
- Allowing tray corners to press against the backrest
- Moving equipment across the chair surface
- Patients stepping or kneeling on the seat
- Pulling the upholstery when adjusting removable cushions
- Forcing accessories against the headrest or armrests
Even a small puncture can allow cleaning fluid to enter the foam underneath. Once the internal foam is exposed, effective cleaning becomes more difficult and the damage can expand rapidly.
Sunlight, Heat and Humidity
Prolonged ultraviolet exposure can fade upholstery, while extreme heat and humidity may accelerate the degradation of the surface layer, adhesives or underlying structure.
If a dental chair is positioned beside a window, blinds, curtains or UV-reducing window films may help limit direct sunlight. Clinics should also maintain a stable indoor environment whenever possible.
How to Clean Dental Chair Upholstery Correctly
There is no single cleaning product that is safe for every dental chair. A reliable procedure begins with the instructions supplied with the equipment and the cleaner or disinfectant.
The following steps provide a general framework for how to clean dental chair upholstery, but they do not replace the chair manufacturer’s instructions or your clinic’s infection-control protocol.
Step 1: Identify the Upholstery Material
Before using any product, confirm what the upholstery is made from. Dental chairs may use medical-grade vinyl, PU-coated material, microfiber leather or another engineered upholstery surface.
Check the equipment documentation or ask the supplier to confirm:
- Upholstery material
- Approved cleaning products
- Compatible disinfectant types
- Products or active ingredients to avoid
- Correct dilution
- Required wet contact time
- Rinsing requirements
- Recommended application method
If the chair has replacement cushions, do not assume they have the same chemical resistance as the original upholstery.
Step 2: Remove Visible Debris
Cleaning and disinfecting are related but different processes. Cleaning removes soil and organic material, while disinfection uses an appropriate chemical process to inactivate microorganisms on the surface.
The CDC notes that cleaning is the necessary first step for environmental surface disinfection. It also recommends following the manufacturer’s directions for the selected cleaner or disinfectant, including dilution and contact time. See the CDC’s environmental infection-control guidance.
Use an approved cleaning method to remove visible debris before applying a disinfectant when disinfection is required. Pay attention to cushion edges and recessed areas where residue can collect.
Step 3: Use a Soft, Compatible Cloth
Where the product instructions allow it, apply the cleaning solution with a soft cloth rather than saturating the chair.

Control excess liquid around:
- Stitched seams
- Cushion connections
- Headrest adjustment mechanisms
- Control switches
- Upholstery edges
- Openings around armrests
The cloth must be wet enough to clean effectively, but the upholstery should not be unnecessarily flooded. Excess liquid may enter seams, mechanical components or the foam beneath damaged upholstery.
Step 4: Follow the Required Contact Time
A disinfectant generally needs to keep the surface wet for a specified period. This is commonly called contact time, dwell time or kill time.
Do not wipe the product away before the required contact time has been reached. On the other hand, leaving the upholstery continuously soaked beyond the manufacturer’s instructions may increase chemical exposure without improving the result.
Always follow:
- The disinfectant label
- The dental chair manufacturer’s instructions
- Applicable local infection-control requirements
- Your clinic’s approved procedure
Step 5: Remove Residue When Required
After the specified contact time, determine whether the chair or disinfectant manufacturer requires the surface to be wiped with a water-dampened cloth or another approved material.
This step can help prevent cleaning-product buildup, but it must only be performed when consistent with the applicable instructions. Do not shorten the required contact time to remove residue more quickly.
Step 6: Allow the Upholstery to Dry
Allow the surface to dry before fitting a reusable cover or seating another patient, unless the product instructions specify a different procedure.
Moisture trapped under a cover may contribute to staining, odor or material deterioration. It can also make the surface uncomfortable for the next patient.
Cleaning Products and Methods to Avoid
The correct product depends on the upholstery manufacturer. Nevertheless, several common mistakes should generally be avoided unless the equipment instructions explicitly permit them.
Abrasive Pads and Stiff Brushes
Rough pads can remove surface texture, create scratches and weaken protective coatings. Use a non-abrasive cleaning material approved for the upholstery.
Unapproved Solvents
Strong solvents may remove ink or dye temporarily while also damaging the upholstery finish. A visually clean result does not necessarily mean that the material remains intact.
Undiluted Concentrated Chemicals
A concentrated chemical is not automatically more effective. Using a product above its specified concentration can damage the chair, expose staff and patients unnecessarily, and conflict with the disinfectant label.
Mixing Cleaning Chemicals
Do not mix disinfectants, detergents or other cleaning chemicals unless the manufacturer specifically instructs you to do so. Chemical mixtures can produce hazardous reactions and unpredictable effects on upholstery.
Excessive Direct Spraying
Uncontrolled spraying can allow liquid to run into seams, switches and chair mechanisms. Follow the product’s approved application method and avoid unnecessary saturation.
Using One Chemical for Every Surface
A cleaner that is suitable for a metal tray, plastic housing or worktop may not be appropriate for dental chair vinyl. Each surface should be cleaned according to its own material and manufacturer instructions.
Household Furniture Products
Furniture polish, leather conditioner and household stain remover should not be applied to dental upholstery without confirming compatibility. Medical and dental upholstery must withstand a different use environment from household furniture.
How Dental Chair Covers Help Extend Upholstery Lifespan
A well-fitted dental chair protective cover creates a physical barrier between the upholstery and many of the substances that contribute to premature wear.

1. Reducing Direct Contact
Depending on its material and coverage, a chair cover may reduce direct contact with:
- Body oils
- Perspiration
- Hair products
- Cosmetics
- Clothing dyes
- Dust
- Minor debris
- Accidental splashes
This is especially valuable around the headrest and seat, which receive frequent patient contact.
2. Limiting Chemical Exposure
A barrier may reduce how often the underlying upholstery is directly exposed to cleaning and disinfecting chemicals. This does not mean that a cover eliminates the need for infection control. The cover must be selected, used, cleaned, disinfected or disposed of according to its intended purpose and manufacturer instructions.
A-dec’s chair instructions specifically recommend barrier covers as a way to preserve its upholstery and reduce reliance on chemical exposure. This is a useful example of why buyers should consult the instructions for their own equipment rather than use a universal chemical routine.
3. Protecting High-Wear Areas
Dental chair covers may be designed to protect the complete chair or specific areas, including:
- Headrest
- Backrest
- Seat cushion
- Leg rest
- Armrests
A complete protective set can provide more consistent coverage, while individual covers allow a clinic to focus on the most frequently contaminated or worn areas.
4. Making Routine Protection More Consistent
A properly selected cover can make it easier for dental teams to establish a repeatable maintenance process. It may also reduce the chance that pigments, cosmetics or debris will accumulate around upholstery seams and edges.
However, the cover must not block chair controls, moving components or adjustment mechanisms.
5. Choosing the Correct Dental Chair Cover
Consider the following factors before ordering:
- Dental chair brand and model
- Cushion dimensions
- Areas requiring coverage
- Disposable or reusable construction
- Fluid resistance
- Surface texture and patient comfort
- Attachment or elastic design
- Cleaning and disinfection requirements
- Chair control and movement clearance
- Required quantity and replacement frequency

A loose cover may move when the patient enters or leaves the chair, while an excessively tight cover can place unnecessary stress on its seams and elastic edges. Providing the supplier with chair photographs, model information and dimensions can improve compatibility.
Kinsun Dental supplies dental chair covers for dental clinics, distributors, equipment repair companies and other B2B buyers. Cover dimensions, colors, materials, packaging and bulk purchasing requirements can be discussed before ordering.
Disposable Covers vs Reusable Protective Covers
These two products should not be treated as interchangeable.
A disposable dental chair cover or barrier is normally intended for short-term use. When used as a clinical barrier, it should be changed according to applicable infection-control procedures and the barrier manufacturer’s instructions.
A reusable dental chair cover is intended for repeated use, but it must be cleaned, disinfected or replaced according to its own instructions. It should not automatically be considered a substitute for a disposable clinical barrier.
Clinics should clearly define the purpose of each cover in their infection-control and equipment-maintenance procedures.
Do Dental Stools Also Need Upholstery Protection?
Dental stool upholstery can experience even more frequent contact and movement than a patient chair. Dentists and assistants repeatedly sit down, stand up, rotate and move across the operatory. This creates friction along the seat edge and exposes the surface to perspiration, clothing, disinfectants and accidental contact with instruments.
The same basic protection principles apply:
- Use only compatible cleaning and disinfecting products.
- Avoid abrasive cleaning tools.
- Remove body oils and visible residue promptly.
- Inspect seat edges and seams regularly.
- Keep sharp instruments away from the cushion.
- Use a properly fitted dental stool cover where appropriate.
- Replace damaged upholstery before the internal foam is exposed.
The construction of the stool also matters. Medical-grade PU and microfiber leather are intended to provide better performance in clinical environments than low-grade household furniture PU or PVC, although every material still needs correct care.
Buyers comparing different options can explore Kinsun dental stools or read our guide to dental stool upholstery materials.
Dental Chair Upholstery Maintenance Schedule
A written maintenance schedule helps clinic staff apply the same procedures consistently.
| Frequency | Recommended task |
|---|---|
| After each patient | Replace applicable disposable barriers and follow the clinic’s approved cleaning and disinfection procedure |
| Daily | Check for visible stains, residue, punctures, cuts and displaced cover edges |
| Weekly | Inspect seams, cushion edges and less-visible contact areas; clean them according to the manufacturer’s instructions |
| Monthly | Examine high-wear areas, including the headrest, seat edge, backrest, armrests and leg rest |
| Every 3–6 months | Reconfirm cleaner and disinfectant compatibility; check reusable covers for wear, loss of fit or damaged waterproof layers |
| As needed | Repair small cuts or replace damaged upholstery before the foam and backing become exposed |
The exact frequency may vary according to chair design, patient volume, cover type and local infection-control requirements. Clinics should incorporate the chair manufacturer’s instructions into their written procedures.
How to Prevent Dental Chair Upholstery Cracking and Peeling
If your main concern is dental chair upholstery cracking, focus on reducing the cumulative stresses that make the surface brittle.
Recommended actions include:
- Confirm the upholstery material and approved cleaners.
- Use protective covers where suitable.
- Avoid unnecessary exposure to aggressive chemicals.
- Observe the disinfectant’s correct dilution and contact time.
- Remove residue when the instructions require it.
- Avoid abrasive pads and vigorous scrubbing.
- Protect the chair from sharp objects and direct sunlight.
- Clean transferred dyes and body oils promptly.
- Inspect small cuts before they spread.
- Train all staff to use the same approved procedure.
Peeling often begins after the surface layer has been chemically weakened or physically damaged. Once the outer layer separates from its backing, cleaning cannot restore the original material. Early prevention is more effective than attempting to repair extensive peeling.
Protecting Upholstery Is More Economical Than Replacing It
Dental chair upholstery does not usually fail after a single event. Damage accumulates through repeated chemical exposure, abrasion, body oils, dye transfer, sunlight and small punctures.
An effective maintenance strategy therefore combines several measures:
- Choose cleaners and disinfectants according to the manufacturer’s instructions.
- Clean visible contamination before disinfection.
- Follow the correct dilution and wet contact time.
- Avoid abrasive tools and excessive liquid.
- Remove chemical residue when required.
- Use suitable dental chair and stool covers.
- Inspect high-wear areas regularly.
- Repair damage before the foam becomes exposed.
Kinsun Dental provides dental chair covers, dental stools and a wide selection of dental chair accessories for distributors, clinics, repair companies and OEM customers. Buyers can contact Kinsun Dental to discuss chair compatibility, dimensions, materials, colors, customized packaging and bulk purchasing requirements.
Frequently Asked Questions
Follow the chair manufacturer’s instructions and the clinic’s infection-control procedure. Applicable disposable barriers are generally changed between patients, while visible contamination should be addressed promptly. Routine inspection and manufacturer-approved cleaning should also be included in the daily maintenance schedule.
There is no universal best cleaner for all dental chairs. The correct choice depends on the upholstery material and the manufacturer’s instructions. Confirm the approved product type, concentration, application method, contact time and residue-removal procedure before use.
Alcohol can damage some upholstery formulations, particularly with repeated exposure or at an incompatible concentration. Other products may tolerate certain alcohol-containing disinfectants. Check the specific chair manufacturer’s instructions rather than applying one rule to every dental chair.
Common causes include incompatible disinfectants, excessive chemical exposure, accumulated residue, abrasive cleaning, sunlight, heat, body oils, dye transfer and physical damage. Once the surface layer becomes brittle or separates from its backing, replacement may be necessary.
Yes. A properly fitted cover can reduce direct contact with body oils, cosmetics, clothing dye, debris and some chemical exposure. The cover must still be used, cleaned, disinfected or disposed of according to its intended purpose and manufacturer instructions.
A suitable dental stool cover can help protect frequently used stool upholstery from friction, perspiration, clothing dyes and contaminants. It must fit securely without interfering with normal sitting, adjustment or movement.
Very small cuts may sometimes be repaired using a compatible professional method, but widespread cracking, peeling, open seams or exposed foam usually requires replacement. Consult the chair manufacturer, dealer or repair provider before applying a generic vinyl repair product.