

A dental stool may look like a simple piece of clinic furniture, but it plays an important role in daily treatment efficiency, operator comfort and infection-control routines. Dentists, hygienists and assistants may adjust, move and sit on the stool dozens of times each day. As a result, the seat upholstery, adjustment lever, base and casters can collect dust, hair, treatment-room debris and contaminants from frequent contact.

Knowing how to clean and maintain dental stool correctly helps your clinic create a cleaner working environment, preserve the appearance of the stool and reduce avoidable repair or replacement costs. A proper routine also supports smoother movement, stable seating height and more comfortable working posture.
This guide explains how to clean dental stool surfaces, maintain upholstery and casters, inspect the gas lift, and identify when replacement parts may be needed.
Why Dental Stool Cleaning and Maintenance Matter
Dental stools are frequently touched clinical-area items. The seat may be exposed to gloves, uniforms, splashes and aerosols, while the height-control lever, backrest and foot ring are repeatedly handled throughout the day. The casters also move across floors where dust, hair and small debris can collect.
Cleaning and maintenance are not the same thing:
- Cleaning removes visible dirt, dust and organic residue.
- Disinfection reduces many disease-causing microorganisms on a surface.
- Maintenance keeps the moving and structural parts of the stool working safely.
Cleaning should happen before disinfection because visible debris and organic material can reduce the effectiveness of a disinfectant. For dental clinical contact surfaces that are not protected with barriers, CDC guidance recommends cleaning and disinfecting between patients with an appropriate healthcare-use disinfectant, following the product label instructions. CDC guidance on cleaning and disinfecting environmental surfaces
For dental stools, always follow your clinic’s infection-control policy, the disinfectant manufacturer’s directions and the stool manufacturer’s care instructions. Upholstery materials, coating types and metal finishes can vary significantly.
Understand the Parts of Your Dental Stool
Before starting a dental stool cleaning routine, identify the main components. Different areas need slightly different care.
Seat upholstery
Most dental stools use PU, PVC, medical-grade synthetic leather or another wipeable upholstery material. Some seats are seamless, while others have stitched edges or split-seat designs. Seams and gaps need more careful cleaning because they can collect dust and residue.
Backrest, armrest and foot ring
Not every dental stool includes these parts, but they are common on ergonomic stool models. They are frequently touched and should be included in the daily cleaning routine.
Height adjustment lever and gas lift
The lever is a high-touch area. The gas lift cylinder controls stool height and should be kept clean, dry and free from dust buildup. It should not be disassembled by untrained staff.
Five-star base and casters
The base supports the entire stool, while the casters allow the operator to move freely around the dental chair. Hair, fibers, packaging fragments and dust can become wrapped around caster axles and affect rolling performance.
What You Need to Clean a Dental Stool
Prepare the right supplies before beginning. In most cases, you will need:
- Disposable gloves or other appropriate PPE
- A soft, lint-free cloth
- Mild detergent or warm soapy water
- A healthcare-appropriate surface disinfectant or disinfectant wipes
- A small soft brush
- Cotton swabs for narrow spaces
- A dry microfiber cloth
- A small container or tray for removed debris
Avoid abrasive pads, steel wool, harsh scouring powders and strong solvents unless the stool manufacturer specifically approves them. Aggressive chemicals may cause upholstery to become sticky, fade, harden or crack over time. They may also damage plastic caster housings or affect coated metal surfaces.
Do not assume every disinfectant is suitable for every dental stool. Check both the cleaner or disinfectant label and the stool upholstery care instructions before routine use.
How to Clean a Dental Stool Between Patients
A between-patient cleaning routine should be quick, consistent and easy for staff to follow. The exact protocol depends on your clinic’s infection-control plan and whether protective barriers are used.
Step 1: Put on appropriate PPE
Wear gloves and any other required protective equipment according to your clinic procedures. This is especially important if there is visible contamination.
Step 2: Inspect the stool
Look at the seat, backrest, adjustment lever and visible areas of the base. Remove any visible debris, dust or residue before applying disinfectant.
Do not overlook the underside edge of the seat, where hands may contact the stool while repositioning it.
Step 3: Clean the surface first
Use a soft cloth lightly dampened with mild cleaner or warm soapy water to wipe away visible soil. Do not saturate the upholstery or spray liquid directly into seams, lever openings or the gas lift area.
For surfaces with dried residue, allow the damp cloth to soften the area briefly, then wipe gently. Avoid scraping the upholstery with hard tools.
Step 4: Apply disinfectant when required
Once the surface is clean, use a disinfectant suitable for healthcare settings and compatible with the stool material. Follow the product label for dilution, application method and contact time.
The contact time matters. A disinfectant may need to remain visibly wet for a specific period to work as intended. Wiping it off immediately may reduce its effectiveness. CDC guidance also emphasizes following manufacturer instructions for disinfectant use, including dilution, contact time, safe handling and disposal. CDC sterilization and disinfection guidance
Step 5: Allow the surface to dry properly
Allow the surface to air dry if the product instructions require it. If residue remains after the required contact time, follow the upholstery manufacturer’s recommendations for removing it. Some materials benefit from a final wipe with a clean damp cloth and a dry cloth to prevent chemical film buildup.
Step 6: Prepare the stool for the next use
Make sure the stool is dry, stable and positioned correctly. If your clinic uses disposable barriers on appropriate contact areas, replace them between patients according to your infection-control routine.
How to Clean Dental Stool Upholstery
Dental stool upholstery receives the most direct contact and deserves daily attention. Regular cleaning helps preserve its appearance and reduces the chance that oils, disinfectant residue or stains will damage the surface.
Daily upholstery care
At the end of each working day, wipe the entire seat and backrest—not only the center where the operator sits. Pay attention to:
- Front seat edge
- Side edges
- Seams and stitched areas
- Backrest contact areas
- Underside edges
- Split-seat gaps on saddle stools
Use a soft cloth rather than a rough paper towel whenever possible. Repeated friction from abrasive materials can shorten the life of synthetic leather surfaces.
Treat stains early
Fresh stains are generally easier to remove than dried stains. Use a mild cleaner approved for the upholstery material, working from the outside of the stain toward the center. Do not soak the area.
If a stain remains after gentle cleaning, check the stool supplier’s maintenance instructions before using a stronger product. Testing a cleaner on a small, less visible section can help prevent unexpected discoloration.
Prevent cracking and peeling
Cracking or peeling is often related to age, repeated chemical exposure, excessive moisture, poor storage conditions or harsh cleaning products. To reduce these risks:
- Do not leave liquid on the seat for long periods.
- Avoid direct spraying into seams.
- Wipe away excess disinfectant residue when compatible with the product instructions.
- Keep stools away from direct heat sources.
- Do not use sharp instruments or hard objects on the seat.
- Inspect the upholstery regularly for small cracks.
Once upholstery becomes deeply cracked or begins peeling, it may become difficult to clean thoroughly. Replacing the seat or the stool may be the safer long-term choice.

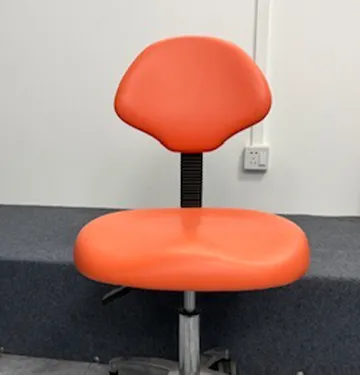
Tips: For easier cleaning, it is recommended to choose dental stool upholstery made of PU material. PU material is usually processed in one piece without splicing, and the surface is smooth and seamless. Microfiber leather cushions need to be sewn due to different manufacturing processes, which will leave gaps and make cleaning the chair cushion more troublesome.
How to Clean and Maintain Dental Stool Casters
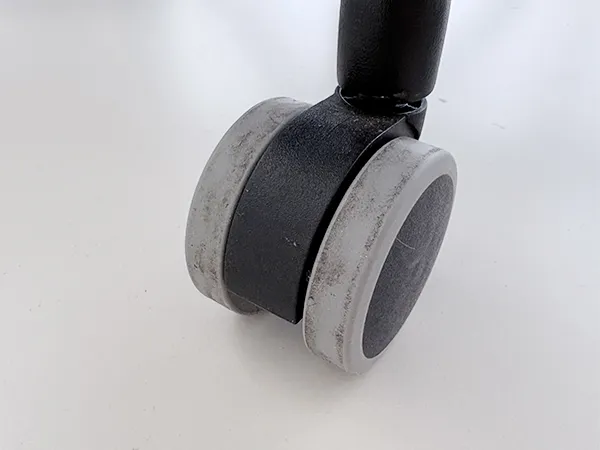
Dental stool caster maintenance is often ignored until the stool begins rolling poorly. However, small debris can quickly affect caster performance. Hair, dental floss, cotton fibers, paper fragments and dust may wrap around the wheel axle, creating resistance and uneven movement.
Inspect casters every week
Turn the stool slightly or carefully place it in a stable position where the wheels can be checked. Look for:
- Hair wrapped around the axle
- Dust packed inside the wheel housing
- Flat spots or cracks on wheels
- Loose casters
- Uneven wear
- Wheels that do not rotate freely
- Unusual noise during movement
Remove debris safely
Use a soft brush, tweezers or cotton swabs to remove loose material around the caster. Avoid sharp tools that may scratch the wheel, housing or floor-protection surface.
If hair is tightly wrapped around the axle, remove it carefully without forcing the wheel. Some caster designs can be removed for cleaning, but only do this if the product structure allows it and your staff know how to reinstall it securely.
Keep the rolling surface clean
Wipe the exterior of the caster and the lower part of the five-star base. A clean wheel surface is less likely to transfer dirt across the treatment room floor.
Avoid applying general lubricating oil to every caster without checking the manufacturer’s recommendation. Excess oil can attract dust, create a slippery floor hazard or damage certain plastic components. If a caster remains noisy or difficult to move after cleaning, replacement may be more practical than lubrication.
If you need to replace the casters on your stool, take a look at our guide to selecting dental stool casters.
How to Maintain the Dental Stool Gas Lift and Base
The gas lift is responsible for smooth height adjustment. A properly functioning stool should rise, lower and hold its selected position without drifting down during use.

Inspect the height adjustment function
At least once each month, check whether the stool:
- Raises and lowers smoothly
- Holds the selected height
- Makes unusual clicking or grinding sounds
- Feels unstable when seated
- Drops slowly during use
- Requires excessive force to adjust
A stool that gradually sinks may have a worn gas lift cylinder. This is usually a mechanical issue rather than a cleaning issue. Avoid opening or repairing a pressurized gas lift cylinder yourself. Contact the supplier or a qualified technician to confirm the correct replacement part.
Clean around the gas lift
Wipe dust from the exposed cylinder and surrounding base with a soft cloth. Keep water and cleaning solution away from openings, joints and moving mechanisms.
Check the five-star base
Inspect the base for cracks, bends, loose caster sockets or unusual wobbling. A damaged base can affect stability and should be addressed promptly. Do not continue using a stool with a visibly cracked base or loose caster connection.
Recommended Dental Stool Cleaning Schedule
A practical schedule makes dental stool maintenance easier to manage across a busy clinic.
| Frequency | Recommended Task |
|---|---|
| Between patients | Clean and disinfect applicable high-touch surfaces according to clinic protocol |
| Daily | Wipe seat, backrest, lever, foot ring, base and caster exterior |
| Weekly | Remove hair and debris from casters; inspect upholstery seams and wheel movement |
| Monthly | Test gas lift performance, inspect base stability and check for loose or damaged parts |
| Every 6–12 months | Review upholstery wear, caster condition and replacement-part needs |
| As needed | Treat stains, replace damaged upholstery, repair or replace worn casters and gas lifts |
The exact interval can vary based on patient volume, stool design, floor type and clinic cleaning procedures. A high-traffic clinic may need more frequent caster and upholstery inspection.
Common Dental Stool Cleaning Mistakes to Avoid
Even regular cleaning can cause problems if the wrong process or products are used.
1. Disinfecting without cleaning first
Visible dirt and organic residue should be removed before disinfection. Cleaning and disinfection serve different purposes.
2. Ignoring disinfectant contact time
A quick wipe may leave the surface looking clean, but it may not meet the disinfectant’s intended performance. Always follow the product label.
3. Spraying liquid directly onto the stool
Direct spraying can allow liquid to enter seams, lever openings, gas lift components or the underside of the seat. Apply the product to a cloth or wipe when appropriate.
4. Using harsh chemicals without checking compatibility
Some chemical products may damage PU, PVC, synthetic leather, plastics or painted surfaces. Compatibility should be confirmed before routine use.
5. Forgetting the casters
A clean seat does not guarantee a well-maintained stool. Dirty casters can affect mobility, collect debris and damage certain floor surfaces.
6. Continuing to use damaged upholstery
Cracked or peeling upholstery may become difficult to clean effectively. It can also make the stool look worn and reduce patient confidence in the clinic environment.
When Should You Replace Dental Stool Parts?
Regular inspection helps clinics replace parts before a minor issue becomes a safety or workflow problem.
Consider replacing dental stool parts when you notice:
- Seat upholstery that is cracked, peeling or permanently stained
- Casters that stick, wobble, crack or roll unevenly
- A gas lift that no longer holds the selected height
- A five-star base with visible cracks or deformation
- Loose caster sockets or repeated caster detachment
- Excessive stool wobbling
- Backrest or foot-ring adjustment failure
For distributors, repair providers and clinic managers, keeping common replacement parts available can reduce downtime. Dental stool casters, gas lifts, bases and seat assemblies should be matched carefully by size, load requirement, installation method and stool model.
Keep Your Dental Stool Clean, Safe and Comfortable
Dental stool is a daily working tool for dental clinic, not just a seat. A consistent routine of cleaning, disinfection, caster care and structural inspection can help your clinic maintain a more professional environment while extending the service life of the stool.
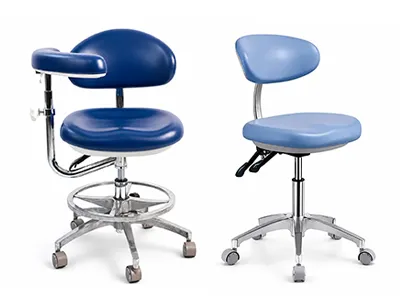
For best results, clean visible debris first, use compatible products, follow disinfectant contact-time instructions and inspect moving parts before performance problems become serious. Small habits—such as weekly caster cleaning and monthly gas lift checks—can make a meaningful difference in comfort, mobility and safety.
Kinsun Dental supplies practical dental stools and related replacement solutions for distributors, dental clinics, repair service providers and OEM buyers. If you need support selecting dental stool casters, gas lifts, bases or complete stool models, contact Kinsun Dental for product-matching assistance and wholesale purchasing options.